How to Install PIP on Windows
Use code KB4KDO0L9 to receive a 10% recurring discount on any server.
Pip is a tool used for installing and managing Python packages. A package contains the required files needed for a module, and pip allows for the easy management of these packages.
In this article, we’ll show you how to install Pip on Windows Server.
See Also: How to Setup Your Own VPN Server on Windows, MAC OS or IOS
Pip System Requirements
In order to install Pip on your Windows Server, you will need to have Python installed first. To check and see if Python is installed on Windows Server, you can open the command prompt

Type the command python to check and see if Python is installed.
If Python is installed and the environment variable has been set, you will see this output:

If Python is not installed, you will see this message:

Either Python is not installed, or you don’t have the environment variable configured. Re-run the Python installation and check again to make sure it is configured properly.
See Also: (Live Webinar) Meet ServerMania: Transform Your Server Hosting Experience
Installing Pip
Step 1: Login to the Server
Login to your Windows Dedicated Server to begin the Pip Windows installation process.
Step 2: Download the Pip Script
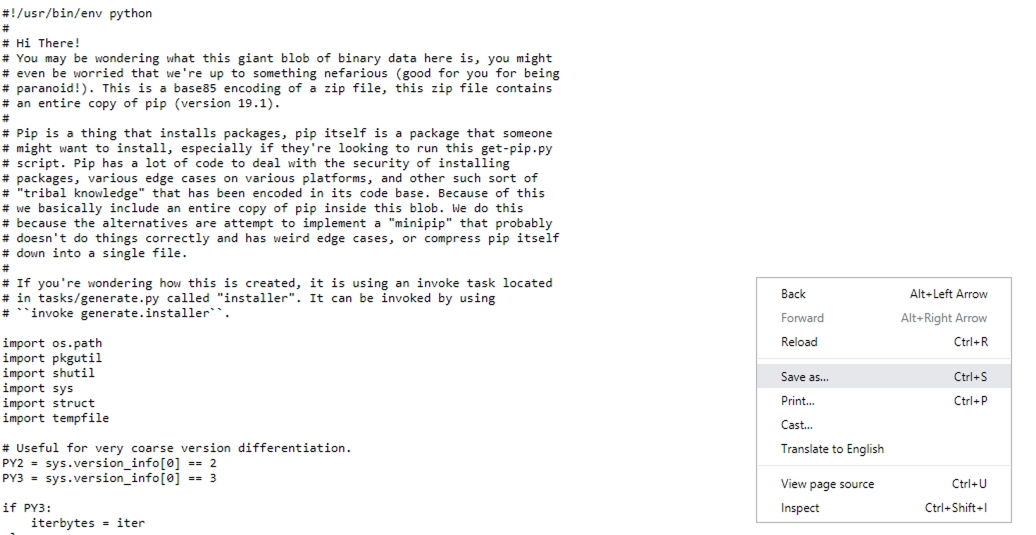
Visit the get-pip.py page and right click on the page to save the file to your computer.

Click the Save button. In this case, we’re saving it to the Desktop.

Step 3: Open the Command Prompt
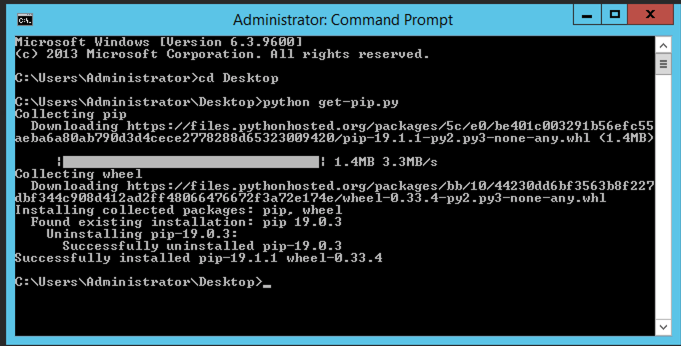
Open the command prompt and use the cd command to change into the directory which contains the get-pip.py file. In our case, we saved it to the Desktop, so we used the following command:
cd Desktop

Step 4: Execute the get-pip.py Script
Run the following command to install Pip
python get-pip.py

Pip is now installed. You can run the following command to check the Pip version and make sure Pip was correctly installed:
pip -V

Now that Pip is installed, you can begin managing python packages.
Was this page helpful?

