How to install Minecraft Server on CentOS 7
This article will walk you through how to install Minecraft Server on a CentOS 7 dedicated gaming server or hybrid smart server from ServerMania.
What You’ll Need:-A CentOS 7 dedicated server-At least 1GB of RAM is recommended-Root access to the server-An SSH client to connect to the server
Step 1: Login to the root user of the server via SSH
 ssh root@serverip
Step 2: Install Java Open JDK
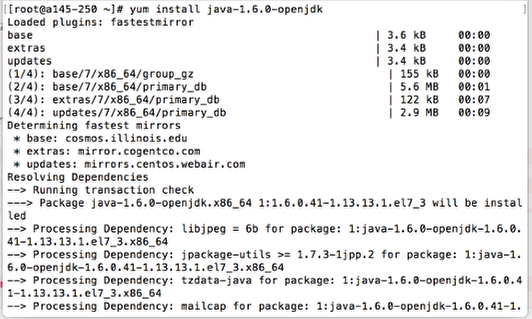
yum install java-1.6.0-openjdk
When prompted, type Y to proceed with the installation.
The screen will display “Complete!” when the installation is successful.
Step 3: Add a user for Minecraft Server to run as

For security purposes, the Minecraft Server should run as its own user. We’ll create a user called mc:
adduser mc
We can then set the password on the mc user:
passwd mc
Step 4: Install wget, iptables-service, nano and screen
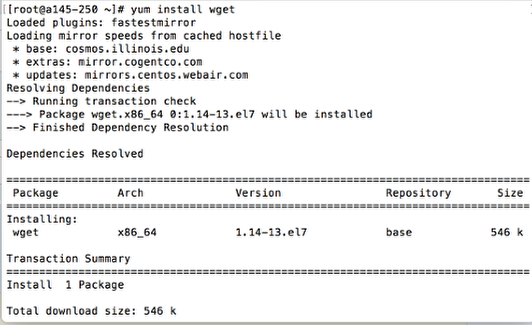
If your server doesn’t have wget, we’ll need to install it:
yum install wget iptables-service screen nano
Step 5: Login as your Minecraft user and download Minecraft
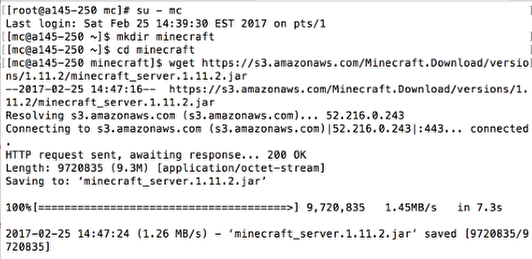
Switch users to the mc user:
su – mccd ~
Create a directory for Minecraft:
mkdir minecraft
Change into the minecraft directory:
cd minecraft
Navigate to the Minecraft Website and copy the URL of the latest .jar file
wget https://s3.amazonaws.com/Minecraft.Download/versions/1.11.2/minecraft_server.1.11.2.jar
Step 6: Update file permissions and open a screen
![]()
Update the permissions on the Minecraft Server file to be executable:
chmod +x minecraft_server.1.11.2.jar
Start screen:
screen
Step 7: Start the Minecraft Server
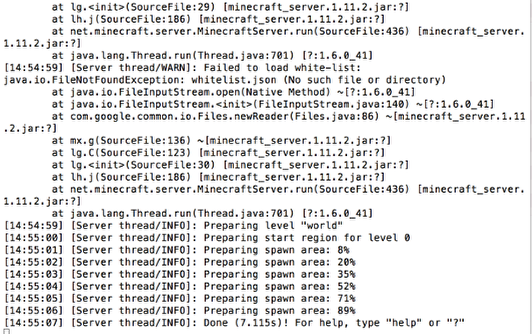
Start the Minecraft Server:
On a 1GB RAM server, run the following command:
java -Xmx768M -Xms768M -jar minecraft_server.1.11.2.jar nogui
If your server has less or more RAM, simply subtract 256MB from the total number of MB of RAM your server has installed.
Edit the eula.txt file and change false to true
Step 8: Exit your screen
![]()
You can exit Screen by typing Control + A and then hitting D to detach.
Step 9: Update iptables

Type exit to logout of the mc user and back into root.
If you are using iptables, open port 25565:
iptables -I INPUT -p tcp –dport 25565 –syn -j ACCEPT
Save the rule to iptables:
/sbin/service iptables save
Step 10: Connecting to your Minecraft Server
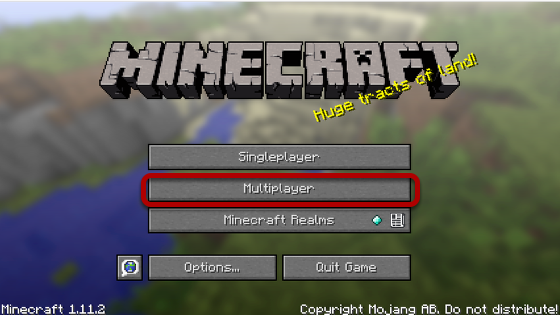
Now that your server is installed, you can connect to it from Minecraft. Launch Minecraft and select Multiplayer.
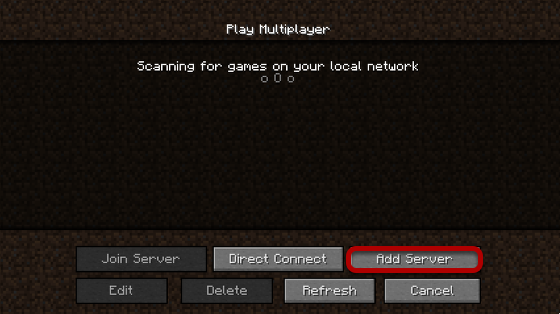
Click Add Server
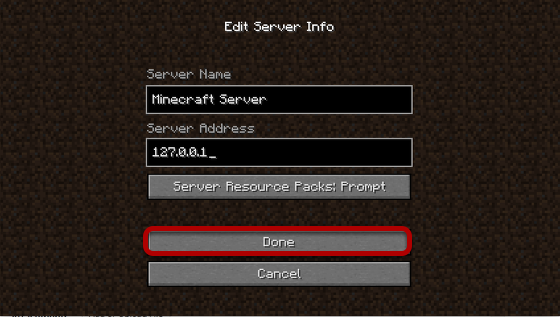
Enter server details and click Done.
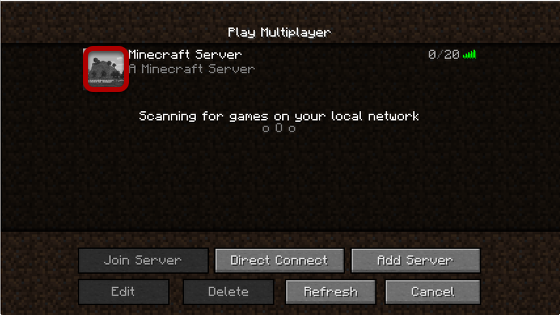
Click the play button next to your server to start playing!
See Also: (Live Webinar) Meet ServerMania: Transform Your Server Hosting Experience
Was this page helpful?

