cPanel WordPress Guide: How to Install, Access and Uninstall
WordPress is an incredibly popular content management system used by some of the world’s largest sites. While it started out as a simple blogging platform, it is now frequently used to power business sites of all sizes.
In this article, we’ll walk you through how to install WordPress via cPanel. This guide would work on a ServerMania Cloud or Dedicated Server if you need a server to host the website on.
See Also:ServerMania WordPress Hosting
Why Businesses Love WordPress
The main advantage of WordPress is that it allows business owners to manage their own site content without the need to bug their developer. Many business owners will hire a website developer to design a custom website for them, or use one of the thousands of WordPress templates available.
WordPress for cPanel is a great option for many businesses because it provides a graphical interface to manage server administration such as creating email accounts, domain names, etc.
Choosing A WordPress Hosting Provider
There are lots of hosting providers to choose from when deploying a WordPress site. If you’re looking to proceed with a WordPress installation for your business or project, you need a hosting account that can grow with you as your site grows.
Historically, shared hosting has been the most popular option for WordPress because it is the cheapest one. Shared hosting involves a hosting provider creating a cPanel account on their server for you that is shared with thousands of other sites. The main disadvantage of shared hosting though is that it cannot support large WordPress sites that start to exceed the system resources of shared hosting
Cloud hosting has become a much more popular option. It’s about the same price as shared hosting but gives you complete control over your server. Cloud servers are also great because they can be upgraded instantly without any downtime or server moves.
Contact our sales team for a custom quote if you’d like to learn more, or visit our cloud hosting page.
See Also: (Live Webinar) Meet ServerMania: Transform Your Server Hosting Experience
WordPress System Requirements
We would recommend the following specifications for a WordPress in cPanel server running a moderately trafficked site:
- Disk Space: 20GB
- Web Server: Apache
- Database: MySQL database version 5.0.15 or greater or any version of MariaDB.
- RAM: 3GB
- PHP: Version 7.4 or greater.
- Processor: 3 CPU Cores
For businesses using cPanel in WordPress as an e-commerce platform or with more demanding requirements, you may need more resources. ServerMania Cloud servers are a great option because they can be upgraded and re-sized at any time.
See our article on WordPress Hosting Requirements for more details and our article on cPanel price to learn more about what is a c panel and the cost associated with cPanel.
How to Install WordPress on cPanel
When you install WordPress with cPanel, you have two options: manually installation or softaculous installation. If you are using a shared hosting provider, there is like an automatic script installer called Softaculous which can automate the install of WordPress for you. If it is not available, proceeding with a manual install is fairly simple.
Manual Installation
Follow these steps to install WordPress from cPanel manually:
Step 1: Log in to cPanel
Login to the cPanel account with your username and password for the domain you wish to setup WordPress on.
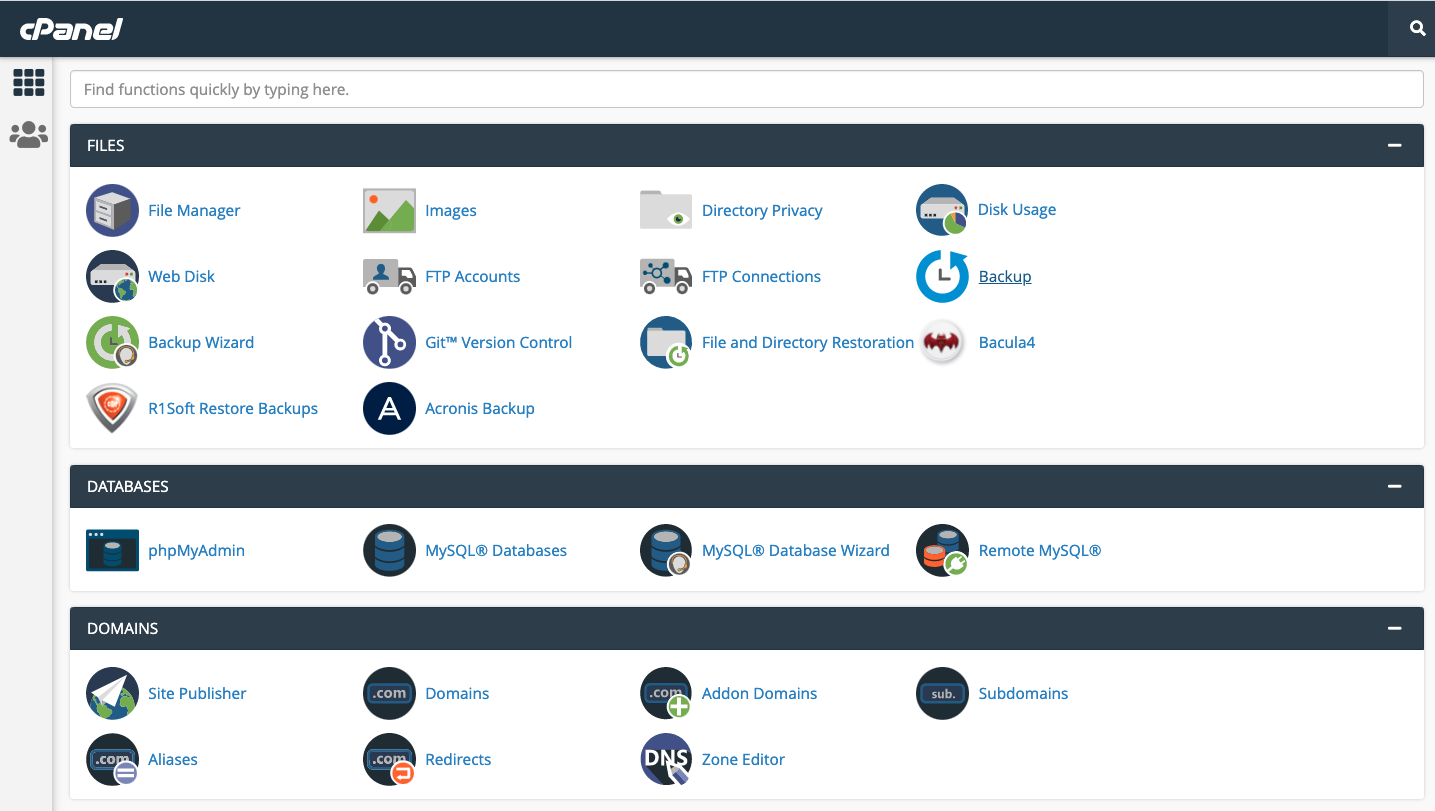
Step 2: Create the Database
We’ll begin by creating a MySQL database. Click on MySQL database wizard:

Enter a name for the WordPress database and click Next Step

Enter a username and password for the database user and click Create user:
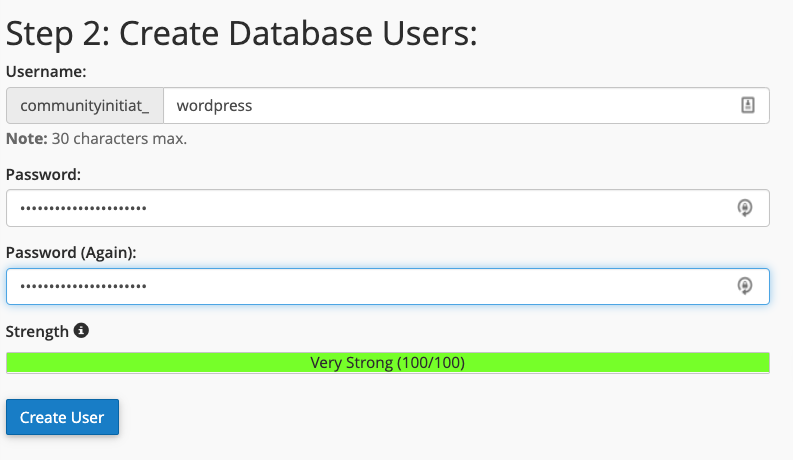
Assign all privileges to the database and click Make Changes
Step 3: Upload WordPress Files
Go to the File Manager in cPanel and click into the public_html directory:

Go to the WordPress website and download the latest version of WordPress.
Click the Upload button:

Drag the ZIP file from your computer onto the screen to upload it
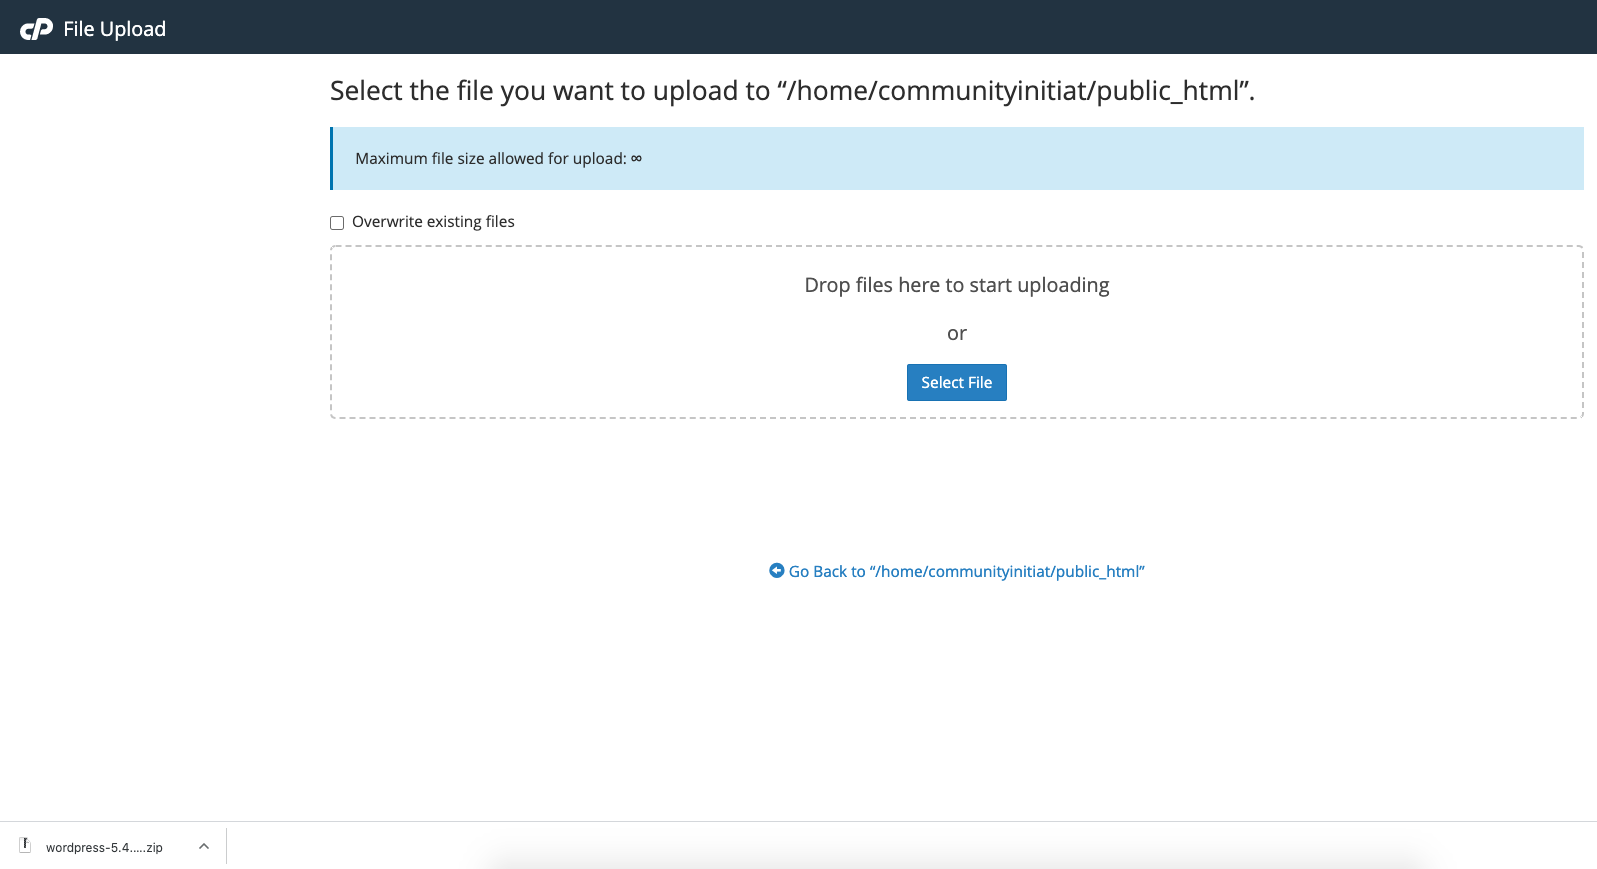
Click Go back
Select the WordPress file and click Extract

Click Extract Files
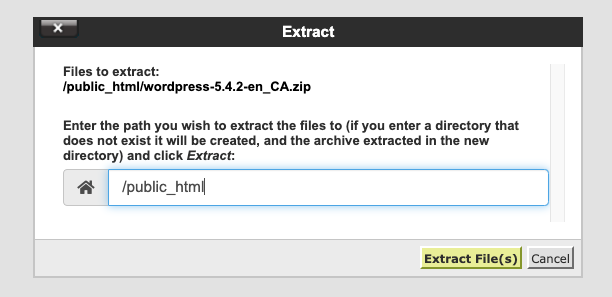
Delete the ZIP File
Double click on the WordPress directory, select all files and move them to the root public_html directory
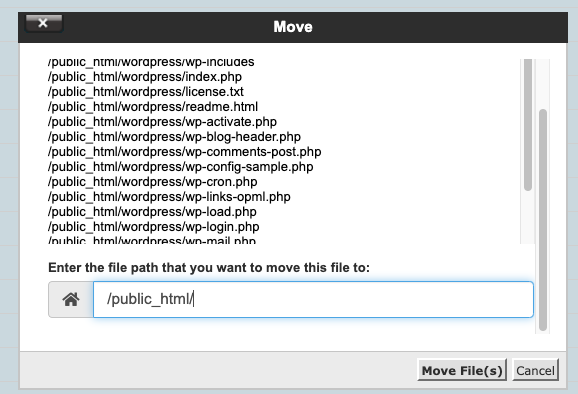
Step 4: Install WordPress
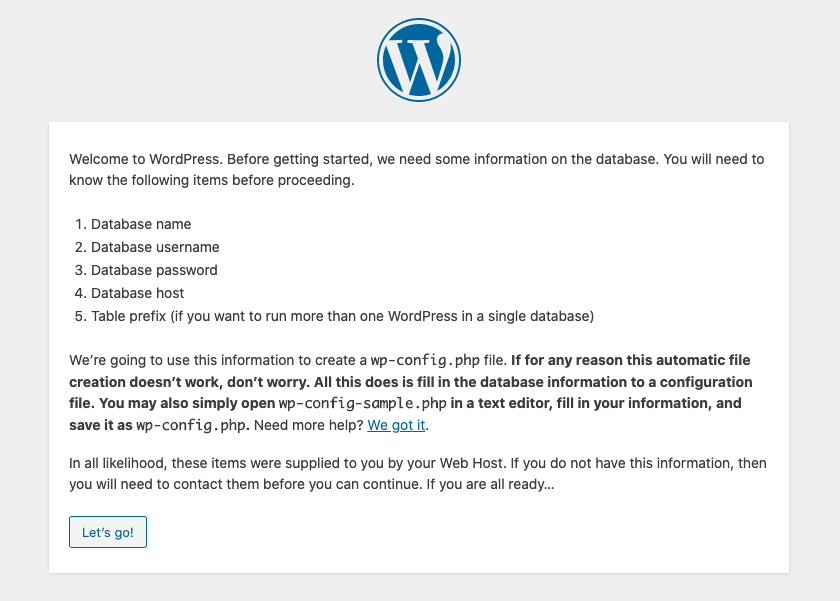
Go to your domain in your browser. The WordPress install page should load if your domain is properly pointed to your server. Click the Let’s Go button
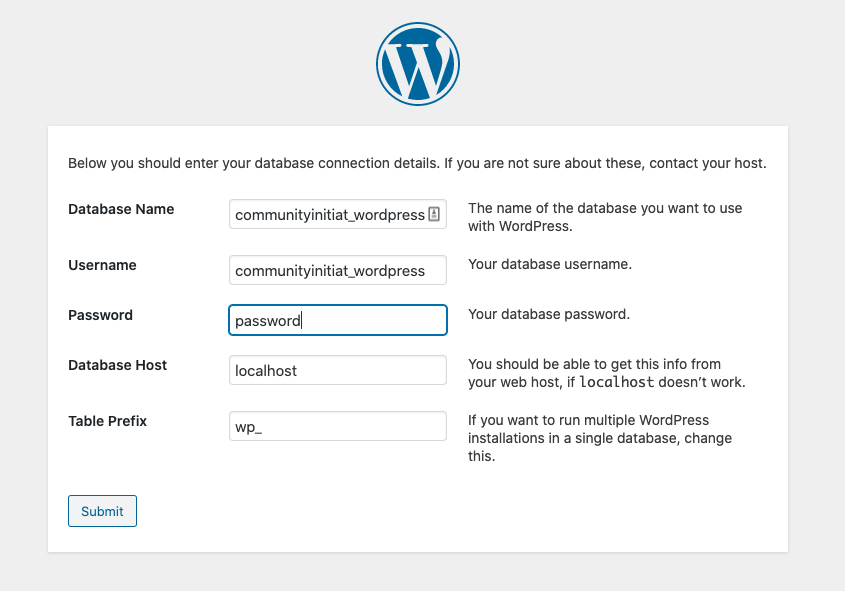
Enter your database details we set up in the previous step
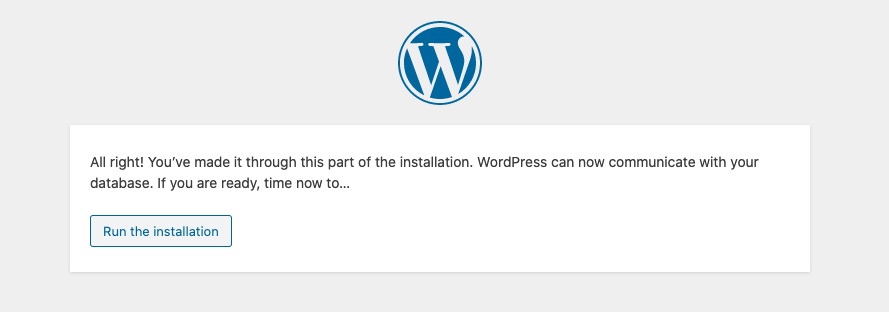
Click Run the Installation
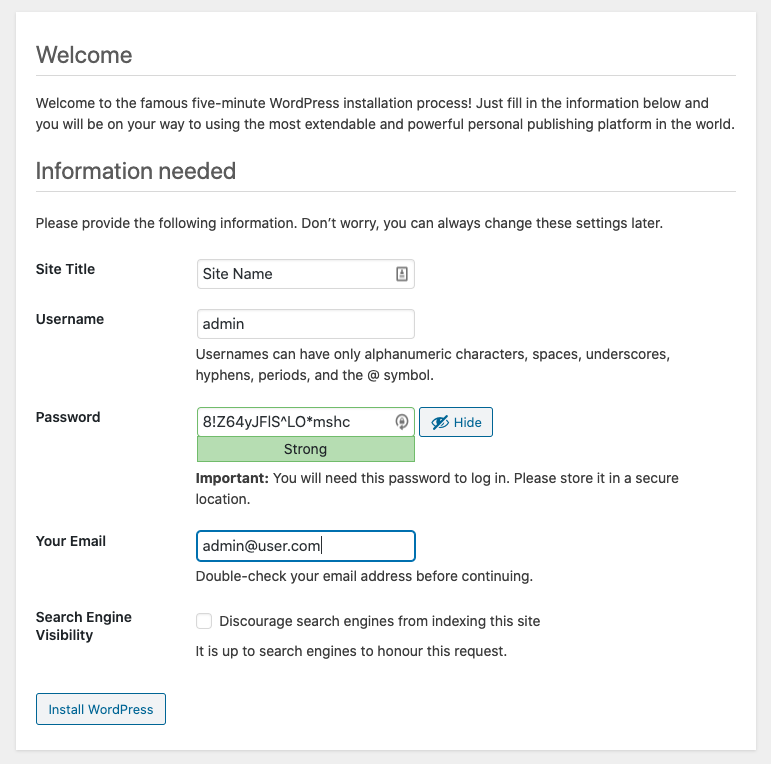
Enter the admin username and password you will use to manage the site, and click Install WordPress.
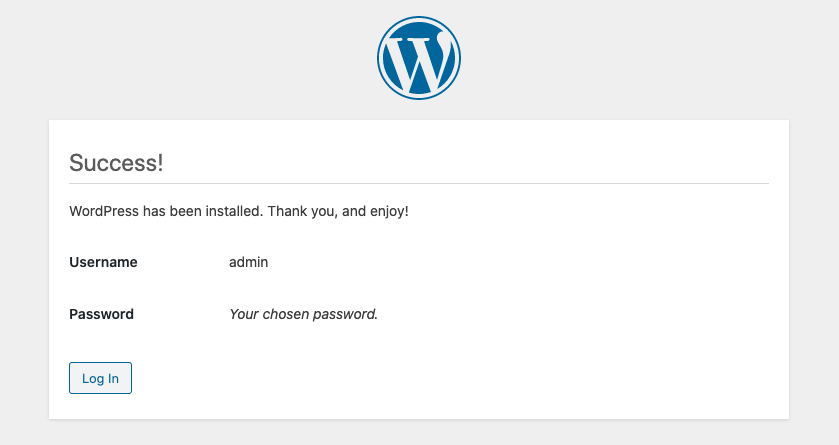
Your WordPress site is now installed! You can click the Login button to get started.
Softaculous Installation
If you have a script installer, WordPress installation is even easier. You can simply login to cPanel and navigate to the script installer and select WordPress:

The installer will guide you through the process and automatically create the database for you.
How to Access cPanel WordPress
Once WordPress is installed via cPanel, you can access it by visiting your domain followed by the page name wp-login.php to manage your website using the WordPress control panel.
How to Uninstall WordPress from cPanel
Uninstalling WordPress using cPanel is a fairly simple process. We’ll basically follow the steps we used to install WordPress in reverse:
Step 1: Log in to cPanel
Login to your hosting account via cPanel.
Step 2: Delete the WordPress Files
Load the File Manager, navigate to the public_html directory, and remove the files related to WordPress.
Step 3: Delete the Database
Click on MySQL databases and delete the user and database associated with WordPress.
All of the files and databases related to WordPress cPanel have now been deleted using the control panel.
Next Steps
You’ve now learned how to install WordPress, login to your site, and uninstall it using cPanel and the WordPress control panel. Our knowledge base contains hundreds of other tutorials to help you make the most of your server hosting experience. Continue browsing to learn more.
Was this page helpful?

